Short Throw Shifter
![]()
Short Throw Shifter
![]()
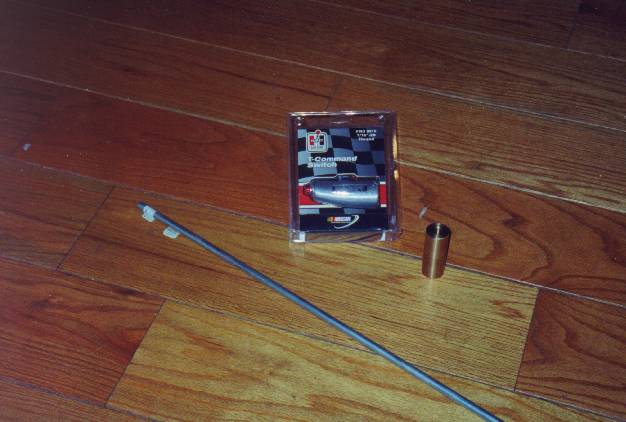
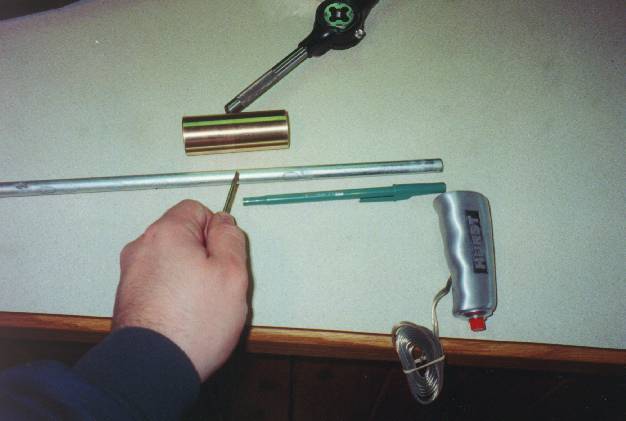
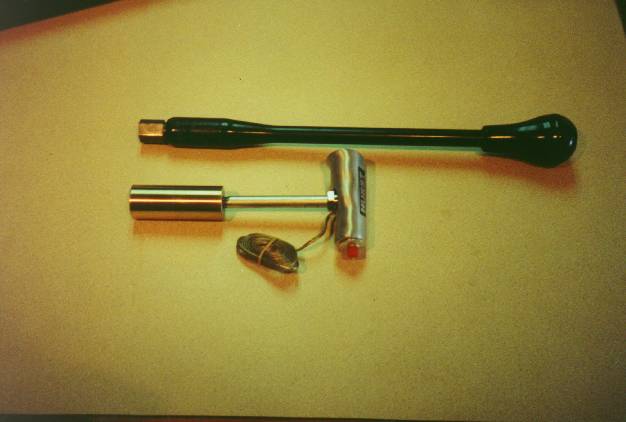
 Here you see all of the parts... The Hurst "T-command" handle,
the 7/16" rod, and the mutant coupling.
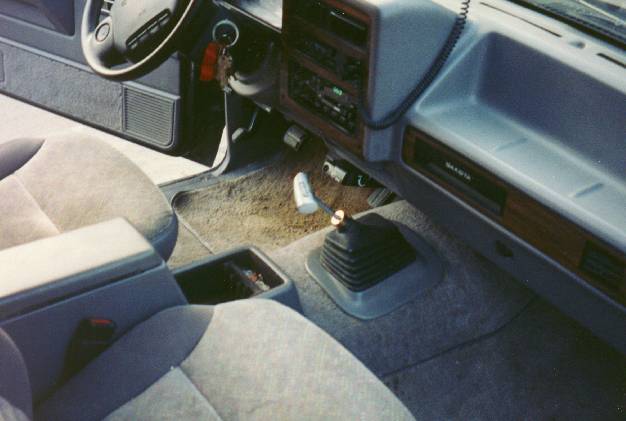
Here you see all of the parts... The Hurst "T-command" handle,
the 7/16" rod, and the mutant coupling.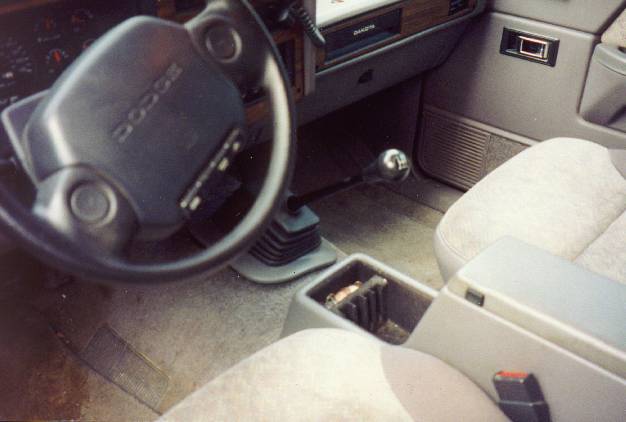 This is the "before" shot; sort of... I had actually been driving
around for a month or so with the boot and such removed; I just set everything
more or less back in place for these pictures.
This is the "before" shot; sort of... I had actually been driving
around for a month or so with the boot and such removed; I just set everything
more or less back in place for these pictures. 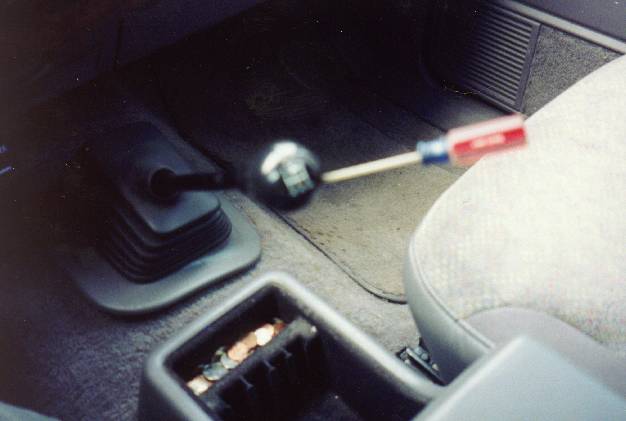
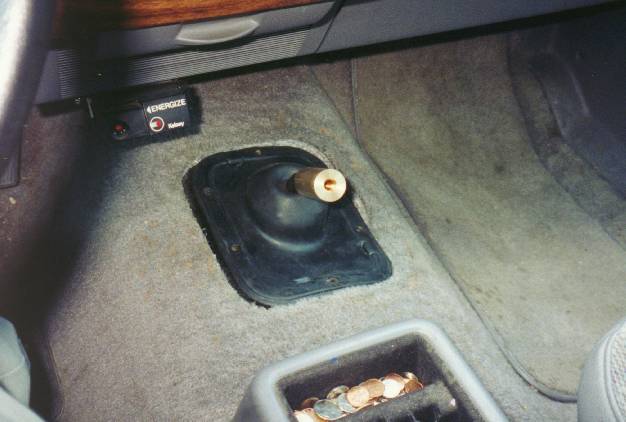
 To remove the stock shifter, you need to stick a screwdriver or something
down alongside the cap with the shift pattern printed on it, and
pry it out. I don't know of a way to do this without
damaging the knob. Maybe if you heated it first? You might be able
to get away without removing the knob. Try pushing the boot down until
the "nut" down there is exposed; you might be able to pull
the lever out of the boot instead of removing the boot over the lever.
To remove the stock shifter, you need to stick a screwdriver or something
down alongside the cap with the shift pattern printed on it, and
pry it out. I don't know of a way to do this without
damaging the knob. Maybe if you heated it first? You might be able
to get away without removing the knob. Try pushing the boot down until
the "nut" down there is exposed; you might be able to pull
the lever out of the boot instead of removing the boot over the lever. 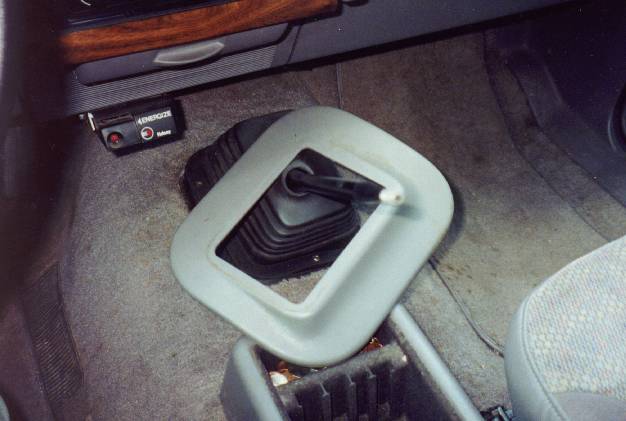 The plastic piece at the base of the boot isn't held in by clips or screws
or anything; just the pressure of the boot above it. Grab it and pull it
out. Once you do that, there are 6 screws around the base of the boot that
you need to remove. A 5/16" socket did the job. An extension helped
to remove the ones at the back. The rubber of the boot will want to push
the socket off the screw, so you'll have to push down at first.
The plastic piece at the base of the boot isn't held in by clips or screws
or anything; just the pressure of the boot above it. Grab it and pull it
out. Once you do that, there are 6 screws around the base of the boot that
you need to remove. A 5/16" socket did the job. An extension helped
to remove the ones at the back. The rubber of the boot will want to push
the socket off the screw, so you'll have to push down at first.
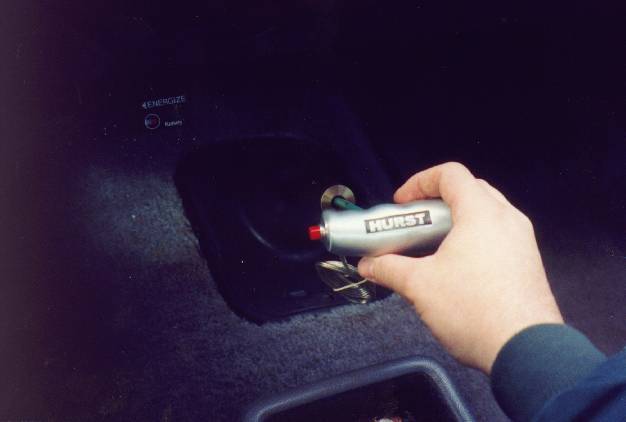
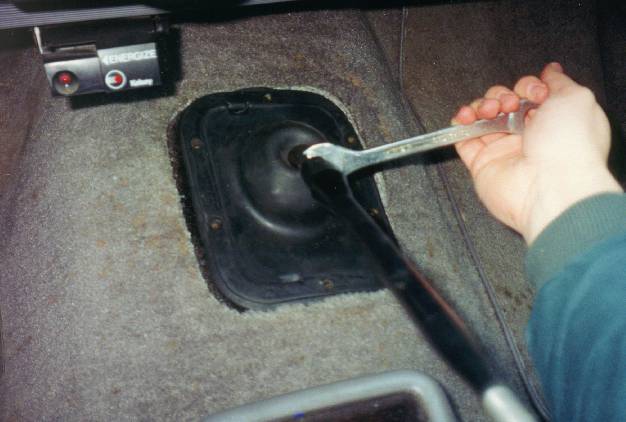 To remove the stick, crank counter-clockwise on that "nut" which
is sort've integrated into the stick. It didn't want to budge for me,
so after much frustration and trying to jockey for position in the
cab, I introduced it to Mr. Pipe Wrench, which snapped that thing
loose so quickly that I wished I had thought of it 5 minutes before...
After the initial loosening, an 11/16" wrench worked just fine.
To remove the stick, crank counter-clockwise on that "nut" which
is sort've integrated into the stick. It didn't want to budge for me,
so after much frustration and trying to jockey for position in the
cab, I introduced it to Mr. Pipe Wrench, which snapped that thing
loose so quickly that I wished I had thought of it 5 minutes before...
After the initial loosening, an 11/16" wrench worked just fine.
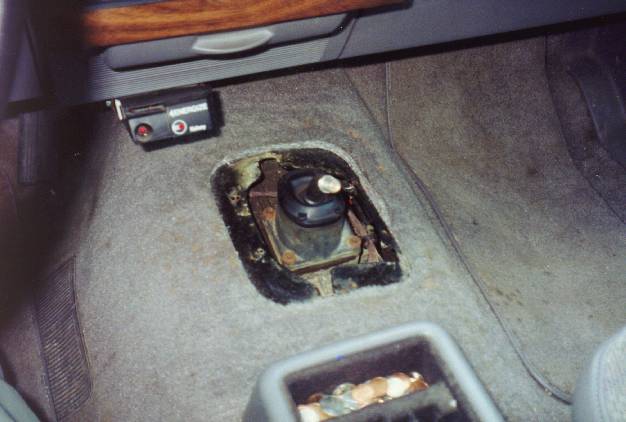 After you remove the stick, this is what you're left with. The pic at
the right shows what it looks like with that rubber guard out of the
way. If you look through the hole, you can see your tranny, Y pipe,
upstream O2 sensor, and the ground. (Which can be a bit disconcerting if
you drive with it off. Another thing that is a bit disconcerting is the
amount of noise generated by the engine and the tranny. At 3,000rpm,
your engine sounds like its ready to blow up! Its pretty loud.) :-)
After you remove the stick, this is what you're left with. The pic at
the right shows what it looks like with that rubber guard out of the
way. If you look through the hole, you can see your tranny, Y pipe,
upstream O2 sensor, and the ground. (Which can be a bit disconcerting if
you drive with it off. Another thing that is a bit disconcerting is the
amount of noise generated by the engine and the tranny. At 3,000rpm,
your engine sounds like its ready to blow up! Its pretty loud.) :-)
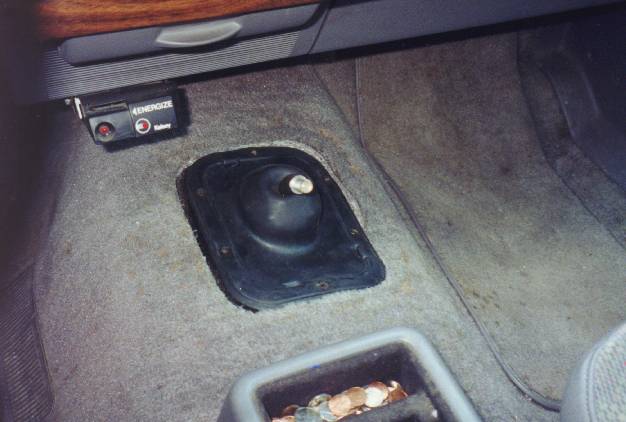
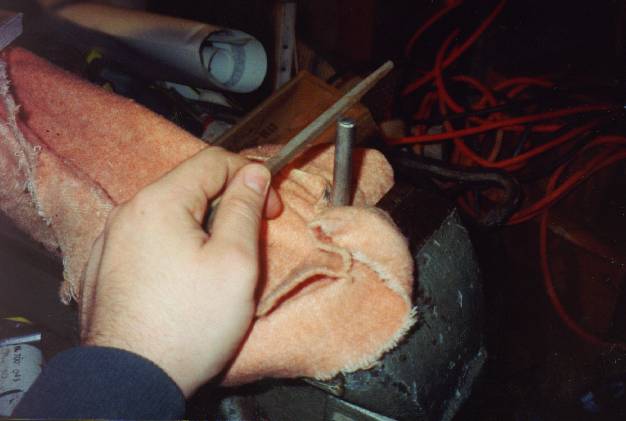
 Here, I have screwed the mutant coupling onto the nub, and I'm trying
to get an idea of how long I want to make the rod. I found a
pen floating around in the cab. When I stuck it in there and put
the handle on top, it seemed just about right, so I went with it.
Here, I have screwed the mutant coupling onto the nub, and I'm trying
to get an idea of how long I want to make the rod. I found a
pen floating around in the cab. When I stuck it in there and put
the handle on top, it seemed just about right, so I went with it.
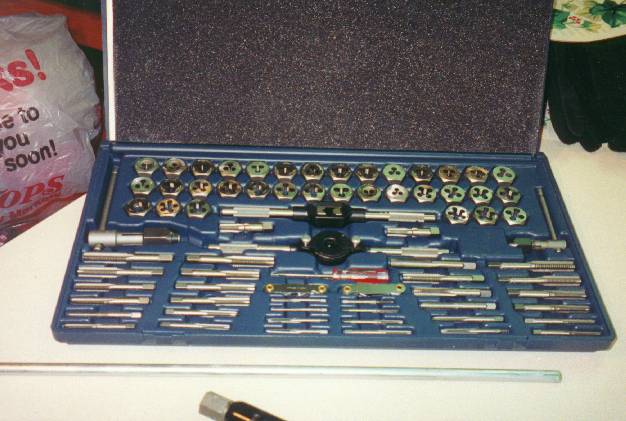
 Finally, time to make the rod! I grabbed the 7/16-20 die, then positioned
the rod on a countertop along with my high-tech measuring pen, to decide
where to cut it. Unfortunately, I made my mark at the middle of the
coupling. As it turns out, the nub on the tranny doesn't actually go
half way up, its a little less. That meant the rod had to sink down
further into the coupling and made the shifter a bit shorter than I
intended. Fortunately, I've got over 2 feet left, so I've got plenty of
opportunities to mess up. :-)
Finally, time to make the rod! I grabbed the 7/16-20 die, then positioned
the rod on a countertop along with my high-tech measuring pen, to decide
where to cut it. Unfortunately, I made my mark at the middle of the
coupling. As it turns out, the nub on the tranny doesn't actually go
half way up, its a little less. That meant the rod had to sink down
further into the coupling and made the shifter a bit shorter than I
intended. Fortunately, I've got over 2 feet left, so I've got plenty of
opportunities to mess up. :-)
 I cut the rod to the desired length, (note to self: next time you cut
a piece of rod with a hacksaw, do not put tap and die lubricant in
the cut! It prolongs the life of the tools, but also makes the
saw about as effective as a butter knife), beveled the edges slightly
with a file to help the die to get started, then cut the thread. Its
important here to keep the work lubricated and especially to make sure
the die is threading straight down the rod. I managed to get a bit off
center, but fortunately not enough to ruin the entire thing.
I cut the rod to the desired length, (note to self: next time you cut
a piece of rod with a hacksaw, do not put tap and die lubricant in
the cut! It prolongs the life of the tools, but also makes the
saw about as effective as a butter knife), beveled the edges slightly
with a file to help the die to get started, then cut the thread. Its
important here to keep the work lubricated and especially to make sure
the die is threading straight down the rod. I managed to get a bit off
center, but fortunately not enough to ruin the entire thing.
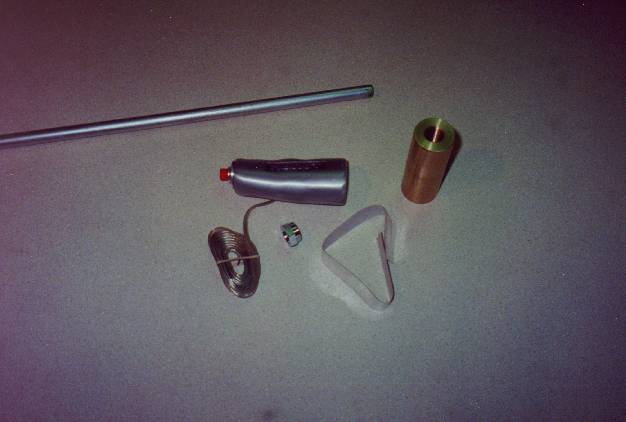
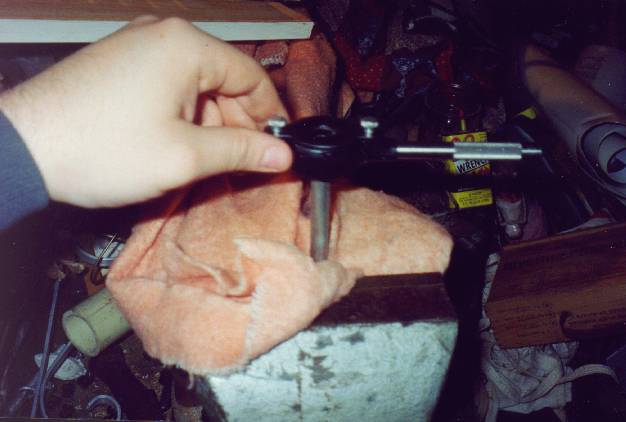
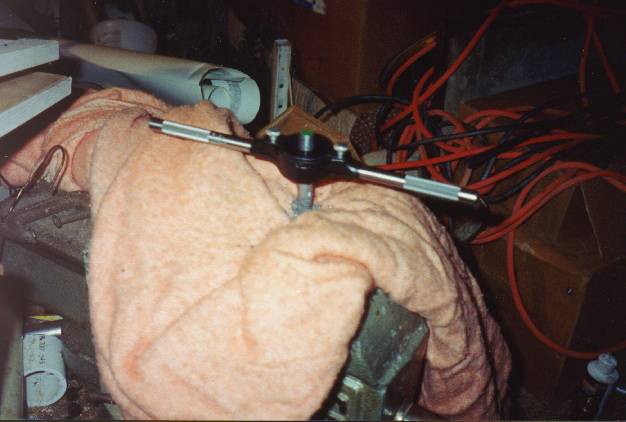
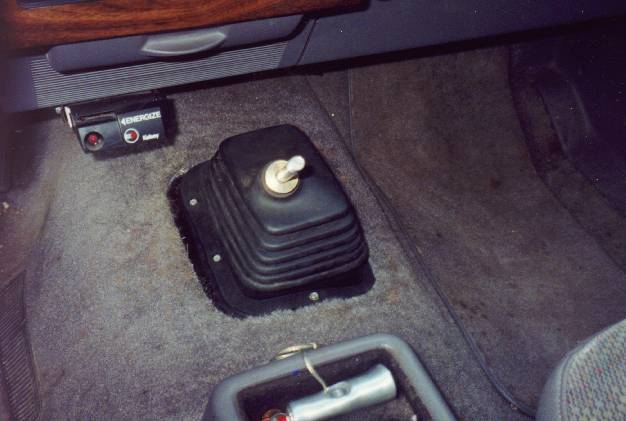
 Put all the parts together, and this is what you get. Not too shabby; its
almost exactly half as long as the stock unit! (16 vs 8 inches)
Put all the parts together, and this is what you get. Not too shabby; its
almost exactly half as long as the stock unit! (16 vs 8 inches)
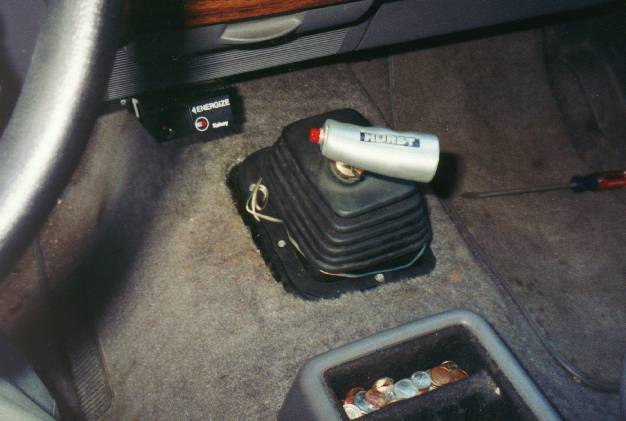 I put the coupling on the nub, and tightened it as much as I could by
hand, then screwed the rod into that. I used two 7/16-20 nuts to
tighten the rod into the coupling. (thread them onto the rod, tighten
them against each other, then wrench clockwise on the top nut to turn the
entire thing...) After replacing the boot, I installed the T handle,
tightening it against the 7/16-20 nut that came with the handle. I routed the
wire into the boot and out the left side. I don't have a use for it at
the moment, so I've just wrapped it around the boot, underneath the plastic
molding. All you have to do now is to put the plastic molding piece back on,
and go for a drive!
I put the coupling on the nub, and tightened it as much as I could by
hand, then screwed the rod into that. I used two 7/16-20 nuts to
tighten the rod into the coupling. (thread them onto the rod, tighten
them against each other, then wrench clockwise on the top nut to turn the
entire thing...) After replacing the boot, I installed the T handle,
tightening it against the 7/16-20 nut that came with the handle. I routed the
wire into the boot and out the left side. I don't have a use for it at
the moment, so I've just wrapped it around the boot, underneath the plastic
molding. All you have to do now is to put the plastic molding piece back on,
and go for a drive!
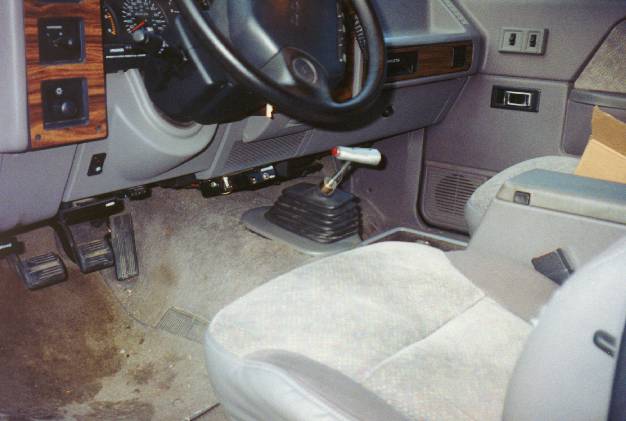
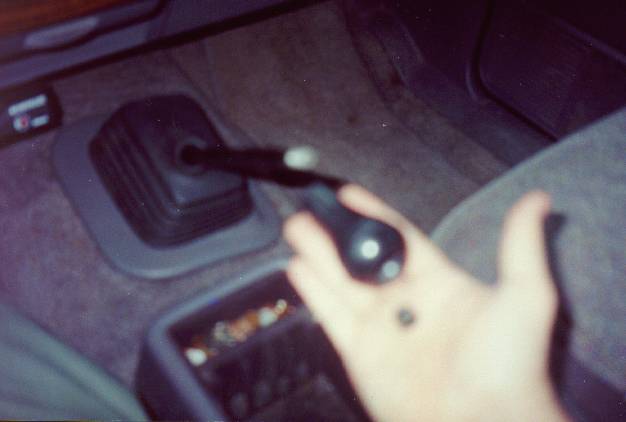
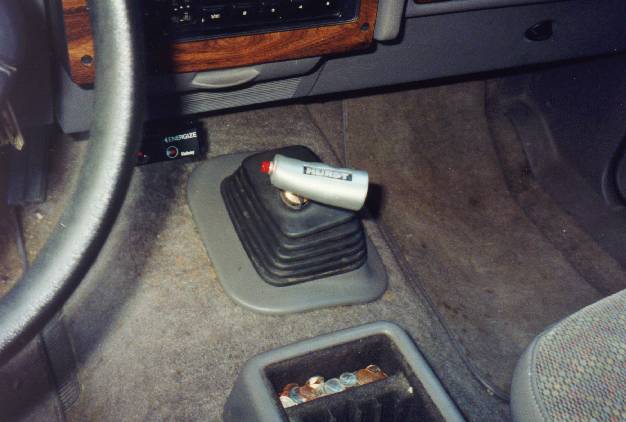 Here is the final product, from a few different angles. After these
pictures were taken, I turned the handle counter-clockwise a bit, to
make the handle more perpendicular to the throw of a shift, as it felt
more comforatable that way.
Here is the final product, from a few different angles. After these
pictures were taken, I turned the handle counter-clockwise a bit, to
make the handle more perpendicular to the throw of a shift, as it felt
more comforatable that way.
| Part | Cost |
|---|---|
| 3" Mutant coupling | $10.00 |
| 7/16" rod | $3.65 |
Hurst shifter handle (p/n 1538510) | $29.75 |
| 2 7/16-20 nuts to tighten rod | $.40 |
| Total | $43.80 |